How to Recover Deleted Pictures From iPhone Text Messages
No ratings yet.
Author's update February 13, 2017: This deleted text message photo recovery post relies on the old buggy attachment deletion that was fixed in iOS 8 and later. You may still have very old attachments lurking on your iPhone if you setup your iPhone from iTunes or iCloud backup since the iOS 7 and earlier days. We have a new article about previewing and saving all of the Messages app photos and videos, which also talks about looking for old lurking deleted Messages app photos, if you want to take a look.
Accidentally deleting text messages can be devastating, especially if you have photos or videos in those messages that you treasure. Thankfully, deleting photos and video text-message attachments doesn't always work correctly on the iPhone1 (or iPad & iPod Touch,) and sometimes we can get those images back.
Back in 2014, I wrote an article about why photos, videos, and other attachments in text messages might be recoverable. This post builds on that article to discuss how to use Decipher TextMessage to recover those deleted photos.
Decipher TextMessage is going to look through your iPhone backups, to find text-message attachments that haven't been fully deleted from your phone.
Step 0: Don't touch your phone yet!
Before we do anything with your phone, we're going to search your computer (automatically) for any existing iTunes backups. Even if you don't think you've backed up recently, iTunes occasionally runs a backup when you sync your phone, so it's worth a look. If the photos you erased are sitting not-erased in a backup already, our job gets significantly easier!
Step 1: Download and run the free trial of Decipher TextMessage
Download the free trial of Decipher TextMessage from https://deciphertools.com/download-decipher-textmessage.html, install it, and run it once. As Decipher TextMessage starts up, it will scan your iTunes backup directory automatically and look for any backups you already have on your computer.
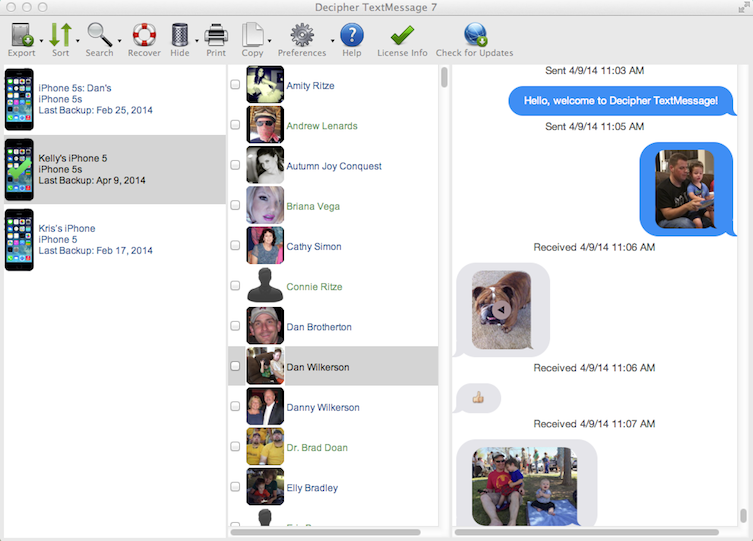
In the main program window, you'll see all of your iOS devices2. Click on the device you're interested in if it is there2 and click on the contacts for which you want to view photos you've sent via text message. If the messages were not deleted when this backup was taken, then you'll see the photos here!
(If you don't see your phone listed here at all, we'll be adding it to the program in steps 2 and 3.)
(If the messages were already deleted at the point of the last backup, don't worry, we'll look for them in step 3.)
Step 2: Make a new backup of your iPhone in iTunes
Decipher TextMessage gets its data from your iPhone backups, so we need to make a new backup to get the latest data from your iPhone. To make a new iPhone backup, do the following:
-
Plug your iPhone into your computer using the USB cable3.
-
Open iTunes on your computer.
-
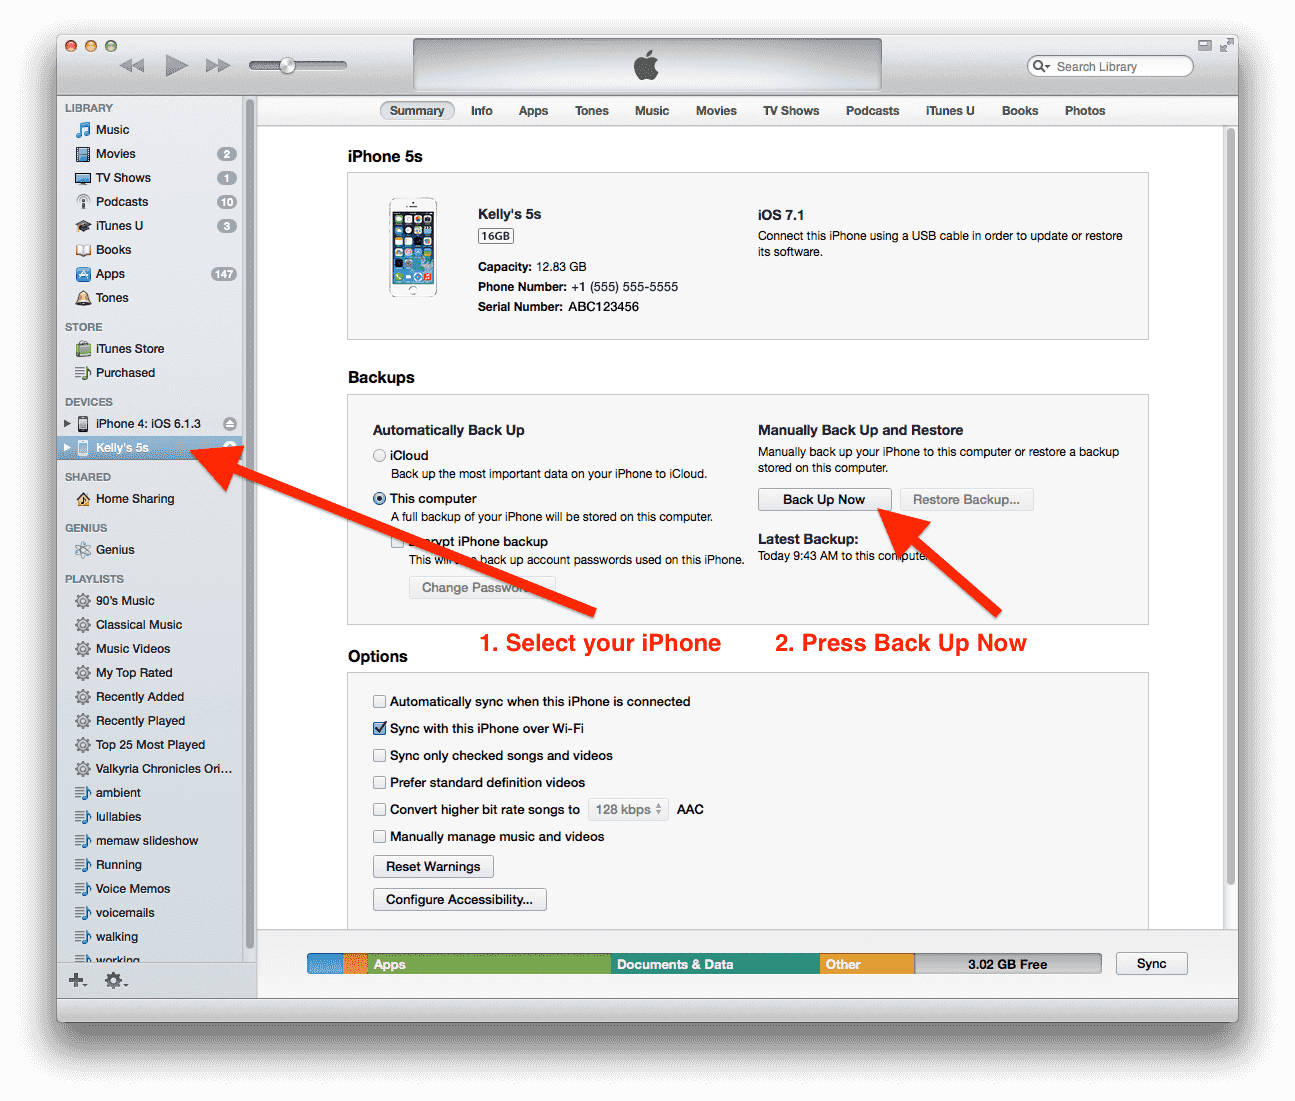
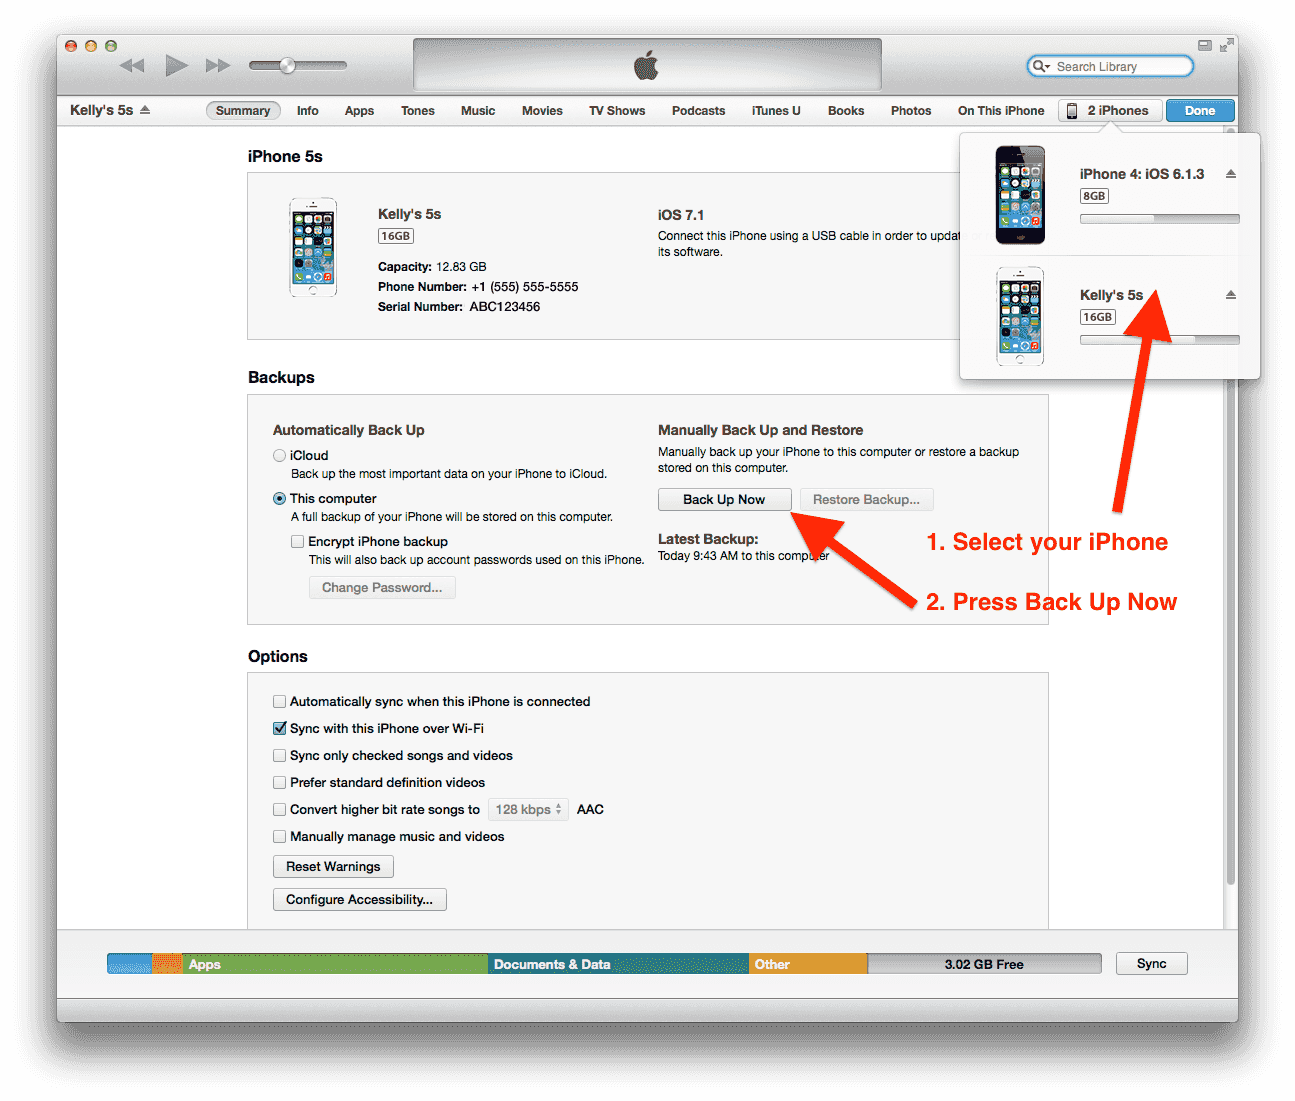
In iTunes, select your iPhone from the list of devices. Your devices will appear either on the left side of the window, or in the upper-right corner as a button like in the following screenshots:
(If this is your first time using this phone with iTunes, you may be asked to "trust" or "authorize" this computer. If so, unlock your phone from the home screen and press the "trust" button on the dialog that appears on the phone.)
(If this is your first time using this phone with iTunes, you may see a big welcome screen asking whether you want to set up your phone as a new phone, or restore from a backup. You should choose to set it up as a new device. Scary as the choice sounds, this won't wipe your phone, it just adds the iPhone to iTunes. If you're in doubt, please feel free to contact us and we'll help guide you!)
-
Once you've selected your iPhone, the summary screen will appear in iTunes. In the Backups section, uncheck the "Encrypt iPhone Backup" option if it's checked and press the "Back Up Now" button.
-
Wait patiently until the backup completes, which could be a few minutes if it's been a while since your last backup. You can see view the progress of the backup at the top of the iTunes window.
Step 3: Use the NEW Attachment Recovery Feature of Decipher TextMessage
Close Decipher TextMessage if it's still open from step 1, and reopen it. After the new backup is imported into the program and the main window appears, select your iPhone from the list of devices on the left side of the window2 and then press the Recover button. In the drop-down menu that appears, select to "Recover Deleted Attachments."
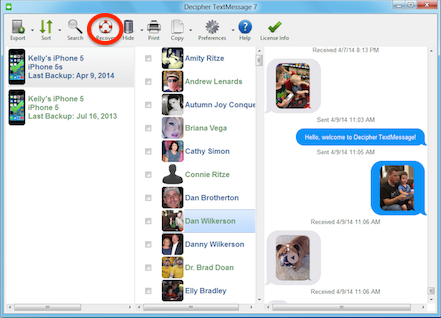
Use the recover button in Decipher TextMessage to search for deleted text messages.
A new window will open with the results of our search for deleted text attachments. This results page is brand new, so we hope you'll contact us if you have questions or see issues!
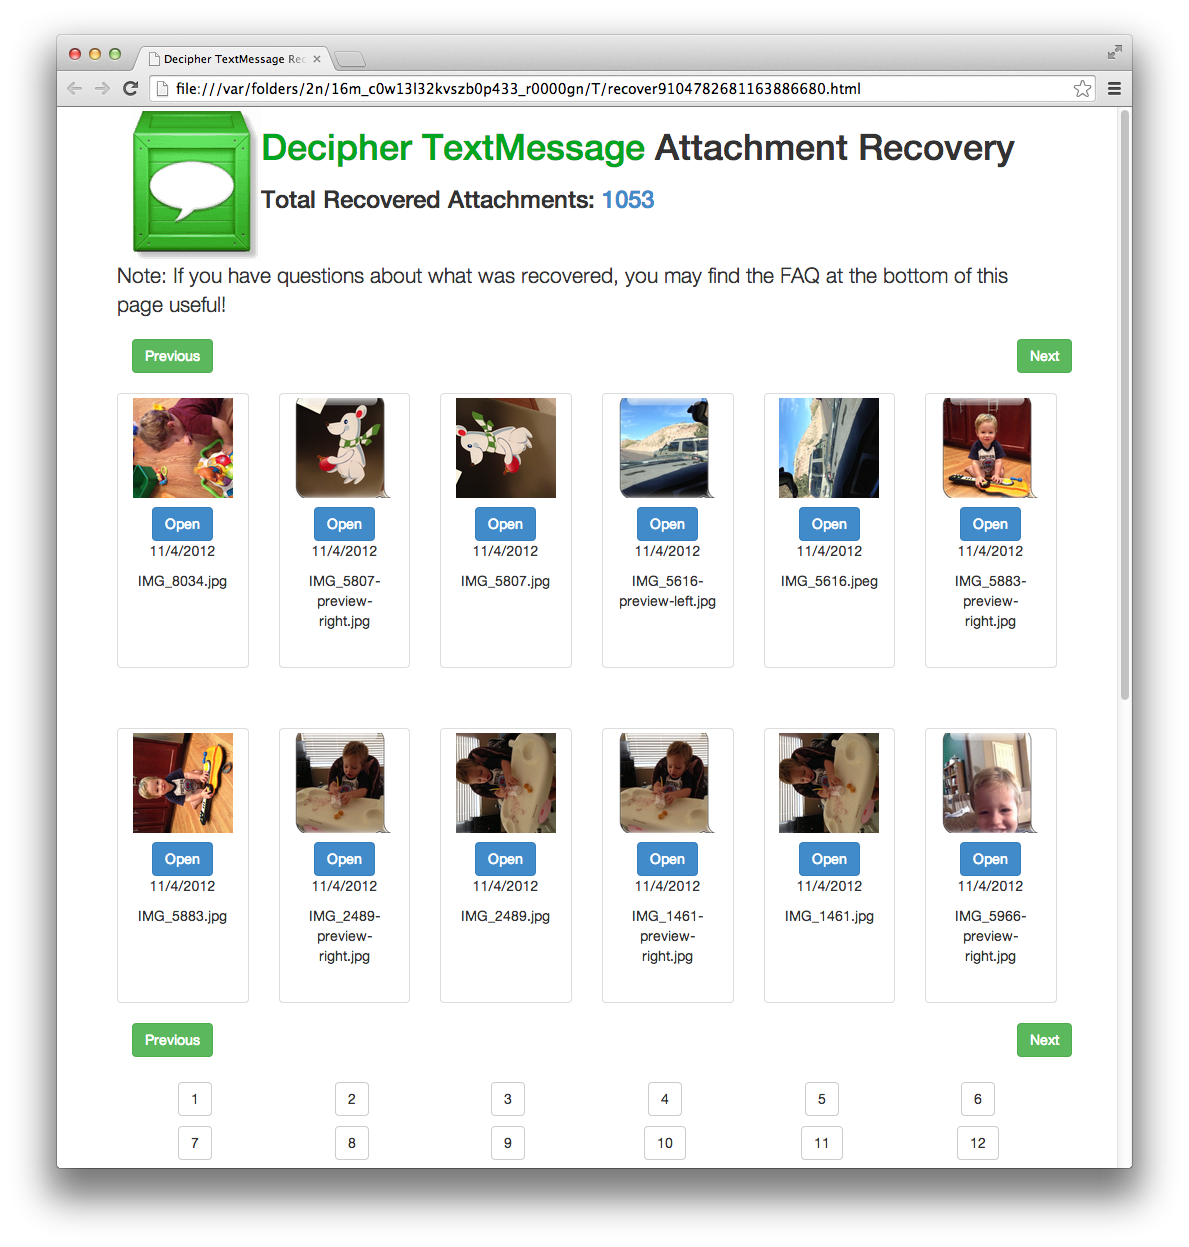 The deleted attachment recovery screen in Decipher TextMessage.
We hope this guide helps you find the important deleted photos! If you have questions, please leave a comment below, or contact us directly. We know your text-message communications are important, and we're happy to help as best we can!
-
From here on out, I'm going to just refer to all devices as iPhones for brevity. All of these techniques work equally well for iPads and iPod Touches, and for SMS, MMS, and iMessages messages alike. ↩
-
If the phone you're recovering from has ALL of the messages erased, click the Preferences button in the top bar and uncheck the option "Hide Empty Devices." ↩↩↩
-
You can also take backups wirelessly if you're unable to plug the phone into the computer often. You can read about how to set up wireless syncing (and backing up) in one of my previous articles. ↩